First Person Animation in Godot
In this blog I will try to explain the process of exporting viewmodel animations from Blender to Godot, using the tutorial series by David Stenfors. If you haven’t checked it out already, it was one of the best resources I could find on this topic. They are a good starting point for people like me that have limited knowledge of Blender. The tutorials are recorded in an older version of Blender, and the results are exported to other engines such as Unity and Unreal. If you are using Godot Engine, you will quickly notice that exporting does not match the results in the tutorial series. After experimenting with these issues, I have found a way to implement this in Godot.
Prerequisites
For this guide the following software was used:
- Blender 4.0.2
- Godot Engine 4.2.1
- Source files from David Stenfor’s tutorial series
Goals
As in any project, it is a good idea to have a clear goal of what you want to achieve. In case of this project, we want the following:
- Export the arms mesh and rig
- Export the gun mesh and rig
- Export the reload animation as demonstration
- Setup the assets in Godot, and synchronize them
Exporting the Arms
Make sure that the animation you want to export starts at frame 1. Move to the action editor with the arm rig selected, and press A to select all frames. Then move them one frame with G + X + 1.
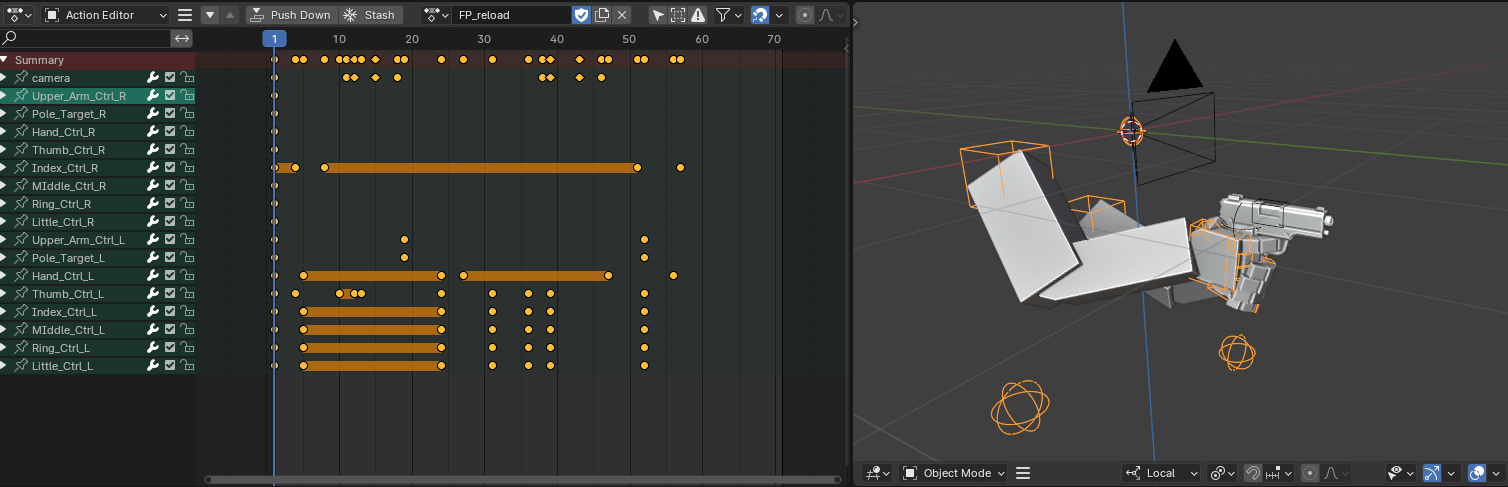
Do the same for the gun animation. Finally, set the end frame time of the animation that takes the most time. In this case, the arms animation takes 57 frames and the gun 71. For this reason it should be set to 71.
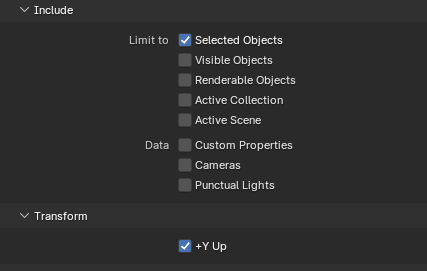
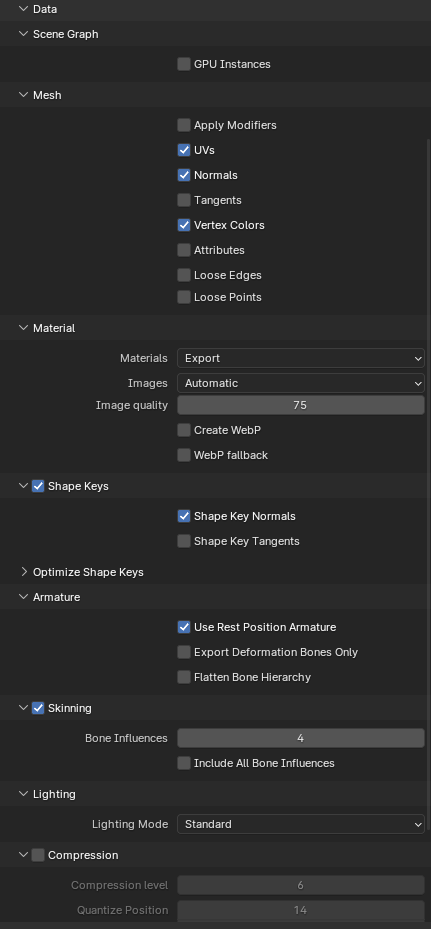
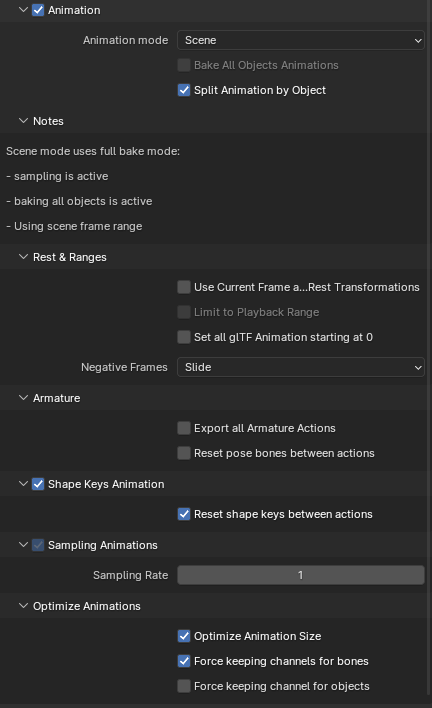
The arm mesh and rig are now ready for export. Select both the arms mesh and rig and go to File -> Export GLTF 2.0. Use the follow settings, and name it SK_FP_Arms.
Exporting the Gun
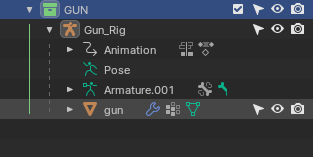
First move the gun rig & mesh to their own collection by selecting both and pressing M. Name it something obvious.
Next, we’re going to link to the gun in a new Blender scene. Open a new Blender scene and choose File -> Link. Navigate to the file that has both the arms and gun (the file you just worked in), and link the collection you created in the previous step.

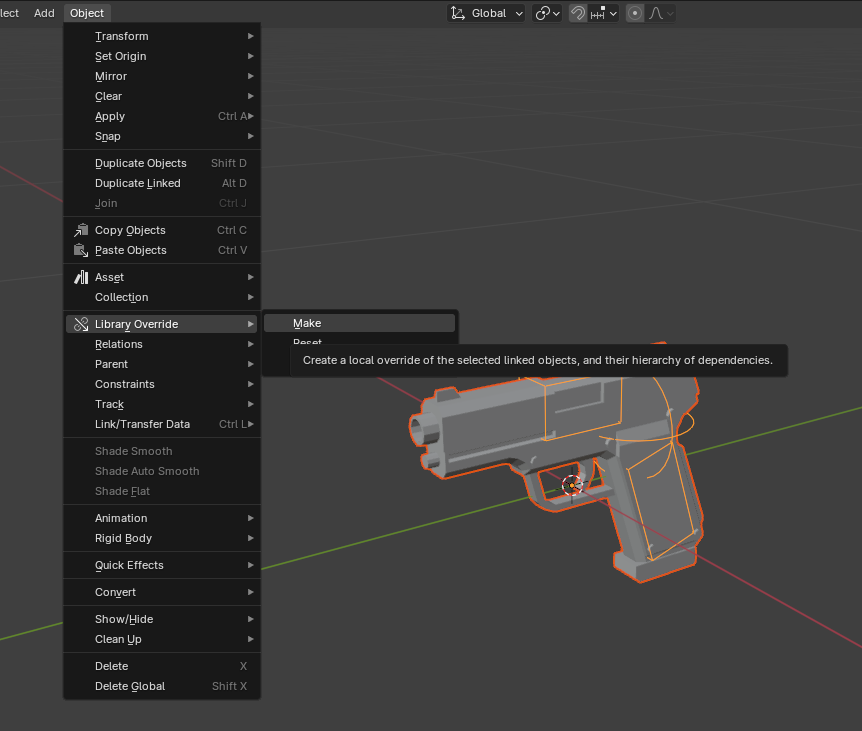
To make the gun editable, we use library override. Select the gun, and go to Object -> Library Override -> Make. Any modifications you make in the main scene will automatically carry over to the linked scene. Make sure to also save this .blend file next to the other file.
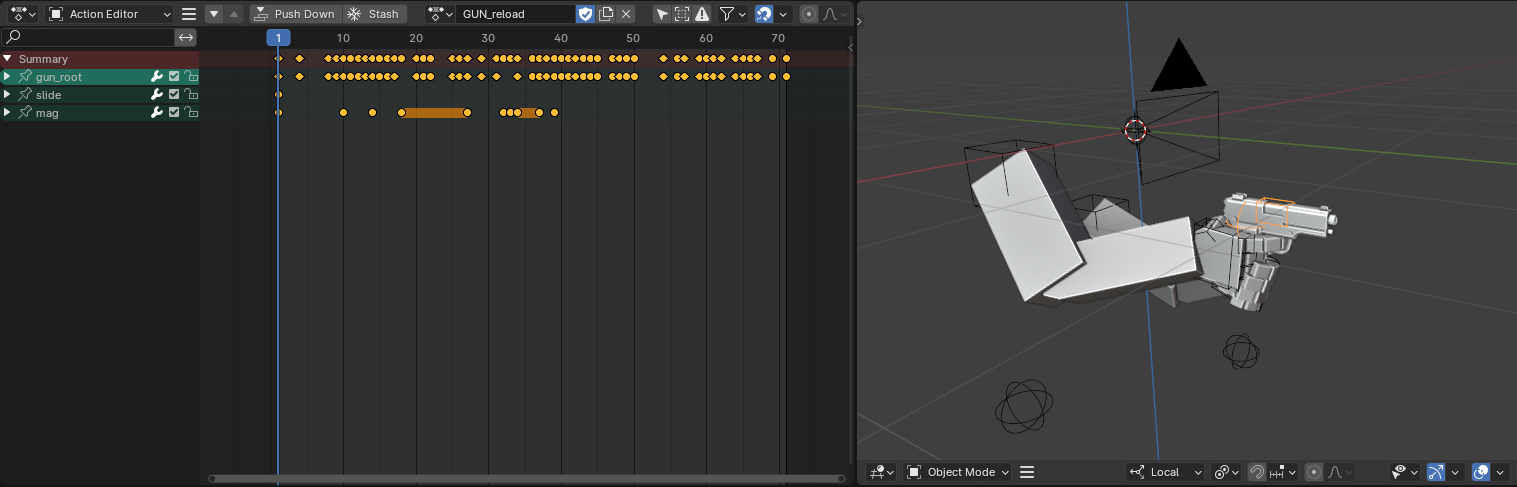
Open the action editor, select the gun rig, and deselect the gun’s root bone. If you can’t edit the action, make sure to press the chain icon in the header bar. It should be located visible next to the action name. Finally press ALT G to clear the location.
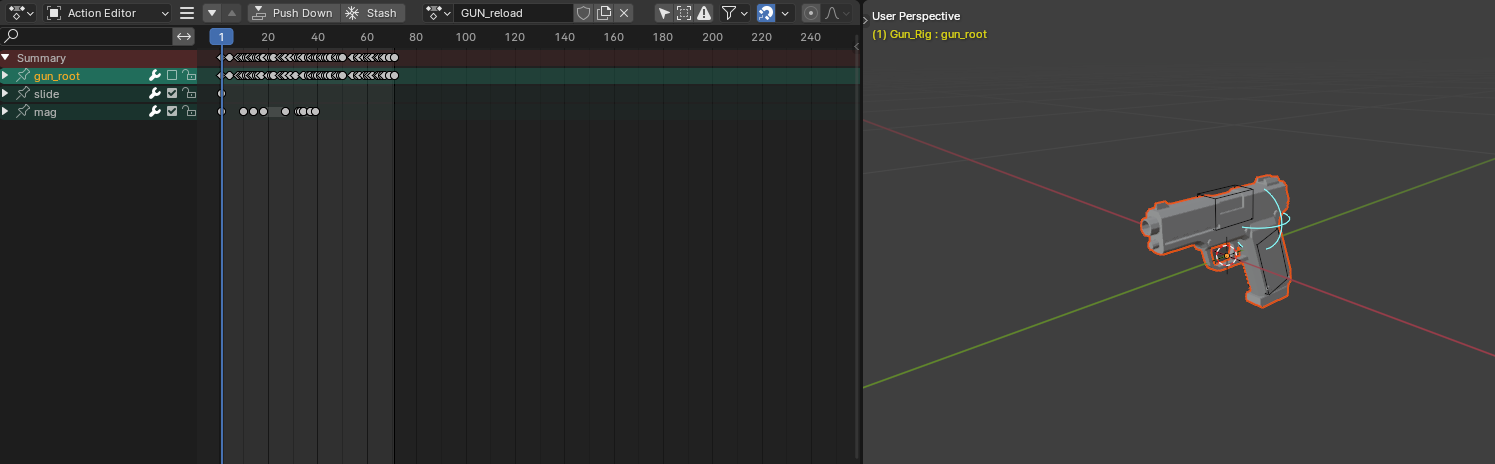
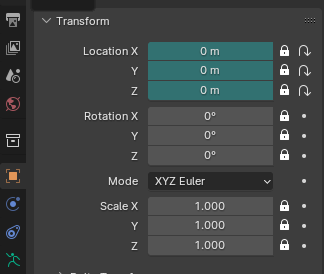
If the gun is still centered on the world origin, you can go into object mode, and navigate to the object properties panel. Make sure that the location X Y Z are all set to 0.
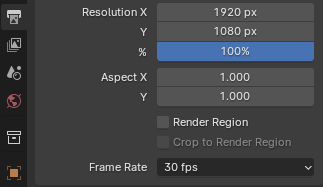
Last setting you have to change before exporting is to set the FPS to 30 in the output panel. This is reset after opening a new Blender scene. Finally, set the end frame to 71, this is the last frame of the gun reload animation. If you play the animation now, only the magazine should move and the gun should stay centered. The gun will later be attached to a socket bone that follows the arm rig’s hand bone.
To export the gun, select the gun rig and mesh and export it as GLTF 2.0 using the same settings as the arms.
Next steps
In the next post, we will setup a Godot scene, import our assets, and play the animations in sync.