Rigging FPS arms in Blender
Prerequisites
- Blender (4 or higher)
- Some low poly arms model
Goals
- Rig and skin the arm model
- Add bone constraints
- Add bone shapes
- Add controller bones
Preparing the arms model
Make sure that the 3D cursor is centered to the world’s origin by using SHIFT + S -> Cursor to world origin. In this example, I am rigging one arm to keep things simple, and to avoid over-information. Everything applies to the other side, which you can easily mirror by using symmetry.
Also consider the scale of the object and make sure all transforms are applied for position, rotation and scale. You generally want the arms in a T-pose. Additionally, it might be a good idea to keep iterations of the rigging proces so you can always go back. For example, keep the arm mesh in a separate .blend file. Then copy this file and add the armature.
Adding the armature
When the arm mesh is centered, and you have applied the scale, you are ready to add a new armature. Press SHIFT + A -> Armature to add your first bone. Go into edit mode. In the bone properties tab (green bone icon), you can rename the bone to root. This will be the main bone. Every other bone will be a child of the root bone.
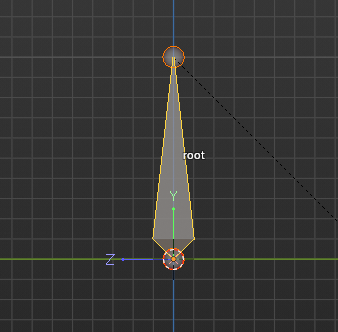
While being in edit mode, select the root bone and duplicate it with SHIFT + D. Move this bone to match the upper arm, lower arm, and hand like so:
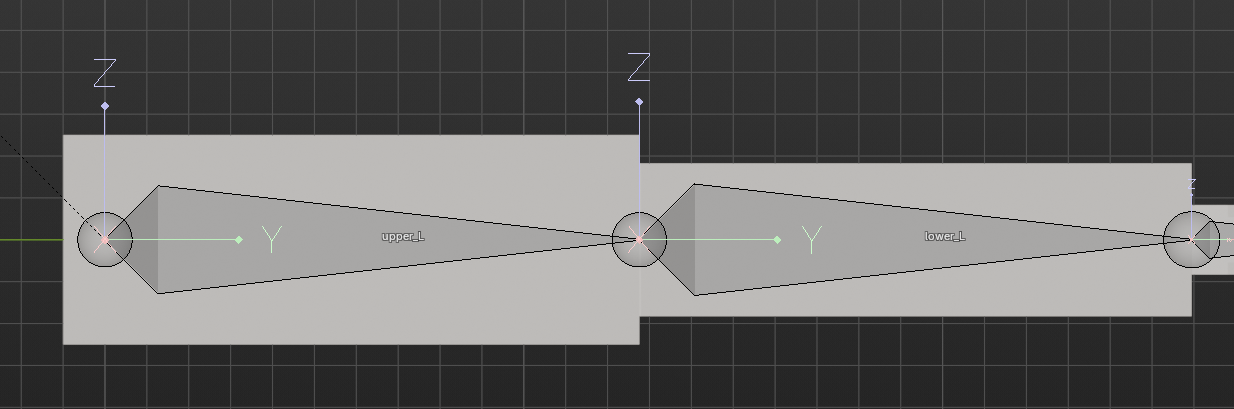
Tip: Pull the elbow slightly back, so there is a ‘bend’ in the arm. This will help the IK-solver later when adding constraints
Make sure that the upper arm bone’s parent is the root bone. You can confirm this in the bone tab under ‘relations’. Visually there will also be a dotted line towards the root bone. The lower arm bone has to be a child of the upper arm bone, and the hand a child of the lower arm bone.
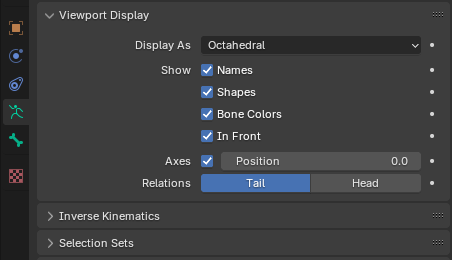
In order to make the rigging process easier, it is generally a good idea to enable certain viewport settings. You can do this by selecting the armature in edit mode. Go to object data properties (green running stick-figure icon), and tick all boxes under viewport display.
Tip: Use the 3D cursor to align the bones perfectly with the low-poly arm mesh. Select the mesh, go into edit mode, select a face, press SHIFT + S -> cursor to selected. Then go back to the arm rig in edit mode, select the bone head or tail, press SHIFT + S -> selection to cursor.
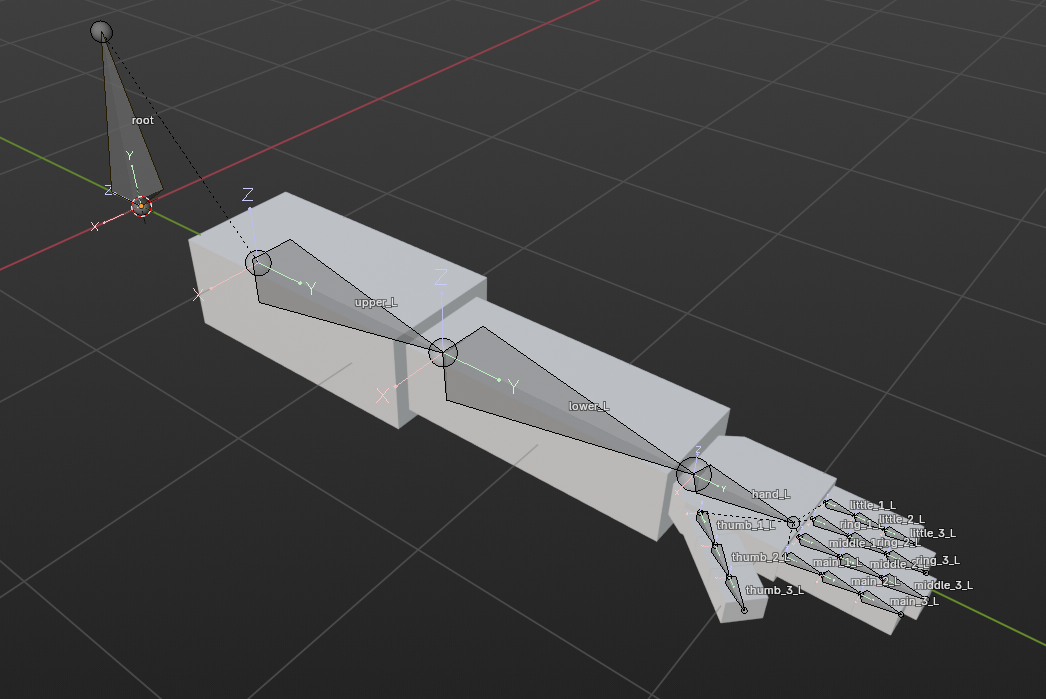
The process above is repeated for the fingers aswell. The lower part of the finger will be a child of the hand bone. The middle part will be a child of the lower finger bone etc. After adding all the bones and naming them, and making sure they are aligned, you should have something like this:
Top-view:

Side:
Make sure to apply all transforms to the rig in object mode to avoid further issues.
Adding controller bones
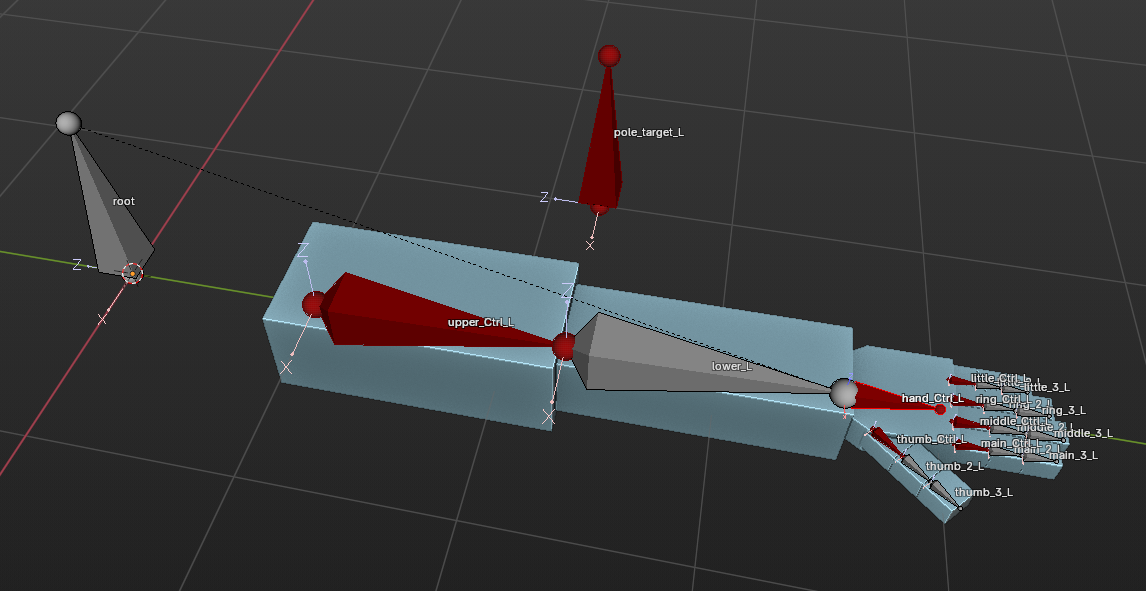
In this part of the guide we’re going to add controller bones. Controller bones will not deform the object, and act as a visual aid to move the actual deform bones that we added in the previous part. The controller bones will have their own bone shape, to make it clear which parts of the rig can be moved.
Duplicate the following bones:
- upper arm (rename to upper_Ctrl_L, parent to root)
- hand (rename to hand_Ctrl_IK_L, parent to root)
- lower fingers (rename to fingername_Ctrl_L, parent all to hand)
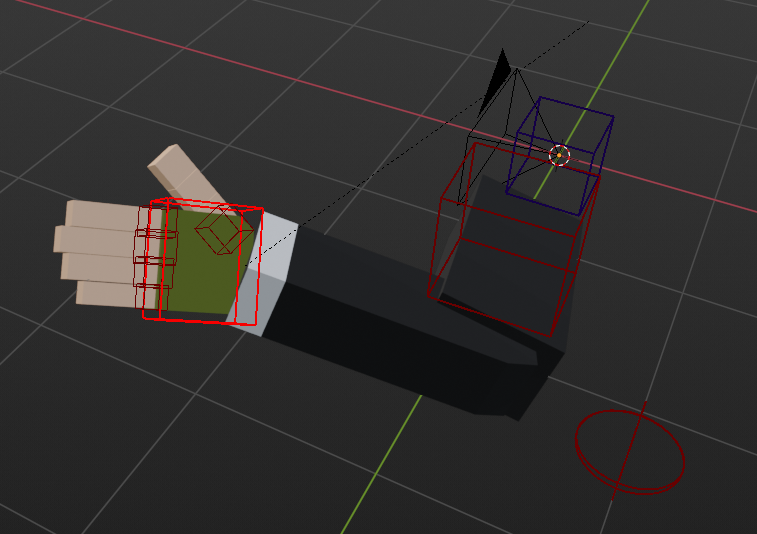
Finally, we also need to add a pole target bone behind the elbow. This is the target that allows the arm to ‘rotate’. See the image for an example. Make sure that in the bone properties the ‘deform’ checkbox is unticked / set to false. If you need to decouple the bones because you have used extrude, use ALT + P to clear the parent.
Tip: Select the controller bones, and go to viewport display. Set bone color to red / blue depending if it is the right or left arm.
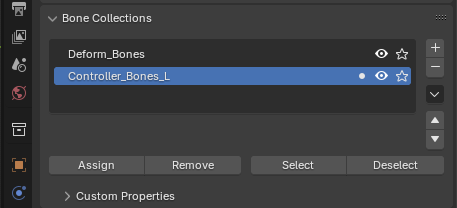
Next, select all your controller bones and assign them to a new bone collection. Note that if you are planning to rig two arms, you want two controller bone collections (for left and right).
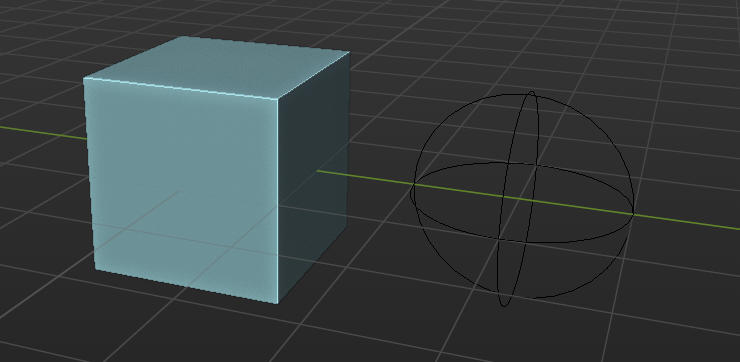
Finally, we want to create bone shapes so the rig will look a bit cleaner. Add a new cube and UV-sphere and move them next to your rig. Add them to a collection, and apply the transforms for both meshes.
In pose mode, select each bone and in the bone properties tab go to viewport display. Use the picker tool to select one of your meshes. Edit it so it surrounds the part of the arm that is controlled.

To be sure, apply the transforms again for the rig with CTRL + A -> Apply transforms.
Adding constraints
In this part of the guide we will add constraints to the bones so they can actually move. Note that you can only add bone constraints in pose mode. They should be added to the deformation bones.
- Adding the IK-solver constraint
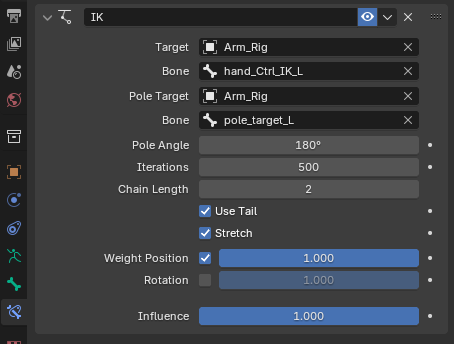
Add the inverse kinematics constraint to the lower arm bone. Set the target to the rig, and select the hand_Ctrl_IK_L bone. Finally we assign the pole target by also selecting the arm rig as the pole target and the pole_target_L as the bone.
The chain length should be set to 2. The pole angle is usually -180 or 180 but set it to a value so the arms are pointing towards the pole target.
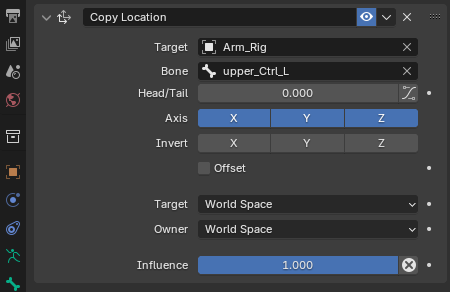
- Adding copy location
The only bone that uses the copy location constraint is the upper arm bone. It follows the location of the control bone.
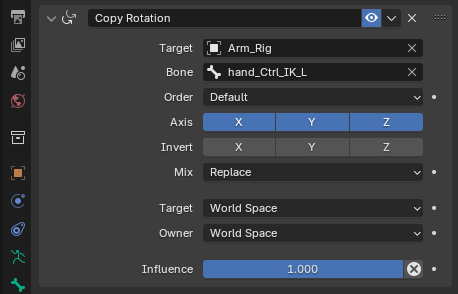
- Adding copy rotation
The copy rotation constraint is used over the rest of the bones, but there are some differences. For the hand we only want to copy the rotation of the controller bone. Also make sure to set the checkbox inherit rotation to false in the relations tab. This is needed so it doesn’t rotate when the parent rotates.
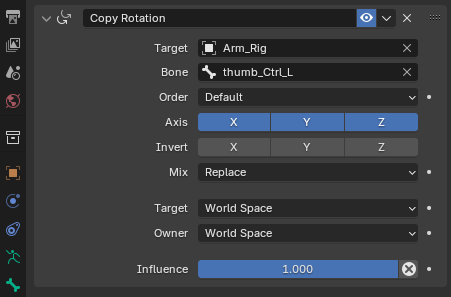
The lower part of the finger has the same constraint has the hand bones with the same settings:
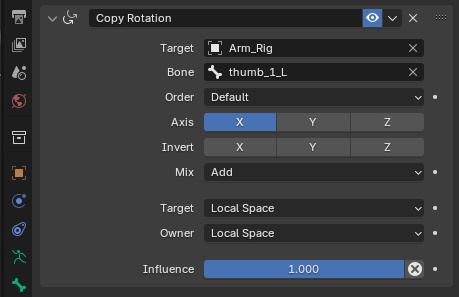
For all the other parts of the bones we use a copy rotation constraint, but limit the axis to X, and set the mix to Add. Additionally, we set the target and owner to Local Space.
Adding a FPS camera
In this part of the guide we will add a camera so we can animate it individually. The camera will not be exported, but it allows us to see our animations from the first person perspective.
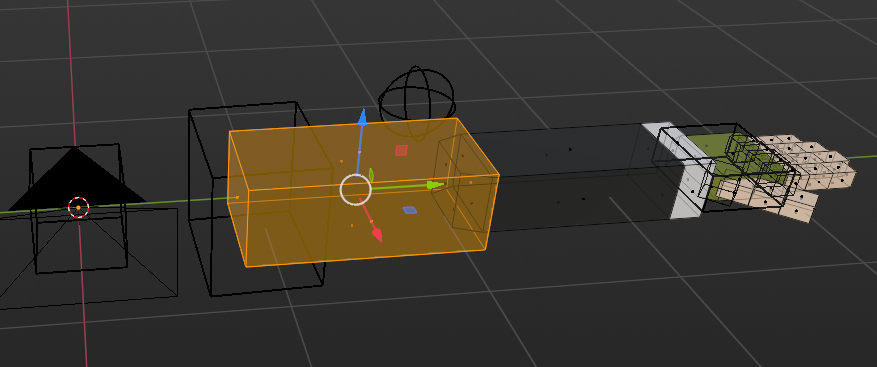
Select the rig and go into edit mode. Press SHIFT + A to add a new bone at the 3D cursor’s location. Move it behind the root bone like so:
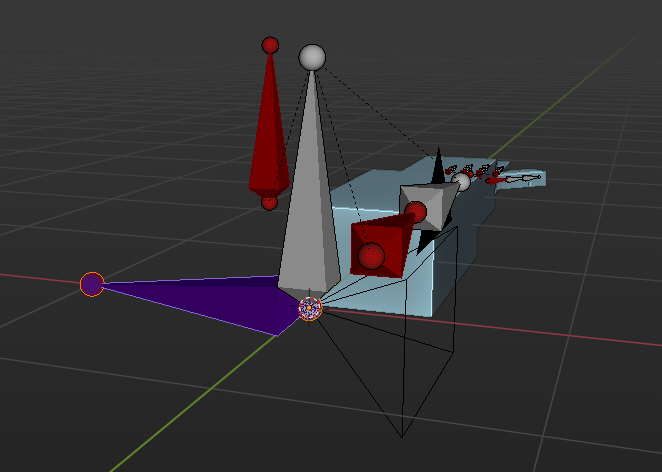
The camera bone is parented to the root bone, and has no controller bone. It is a deform bone, because we want to export the movement of the camera with the rest of the rig after the animation stage. Beacuse of this you can add the bone to the deform bones group and give it a unique color. Next go back into object mode and add the camera. Align it so it faces forward towards the thumb. Set it to field of view and set the FOV value to 90.
Now, to make the camera part of the rig, set its relation to the arm rig:

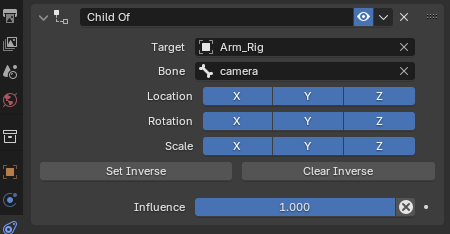
Finally, to make the camera move with the camera bone, add a child of object constraint:
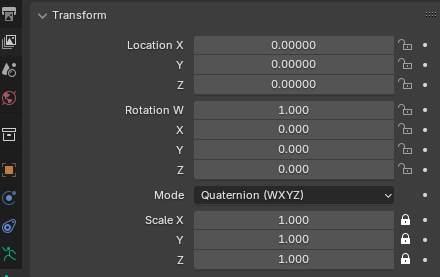
To avoid moving the rig accidently. Lock the unused transforms of the controller bones. For example, the upper arm controller bone wont be scaled, so you apply the lock on that:
Skinning
In this part of the guide we skin the arm mesh to the rig. This is the process where we assign parts of the mesh to a vertex group. A vertex group is then moved by moving the bone.
Because our arms model is low-poly, and we aren’t aiming for anything realistic, we will manually assign parts of the mesh that will move with a certain bone. Go into object mode and select your arm mesh, then select your arm rig. Press CTRL + P and select with empty groups.
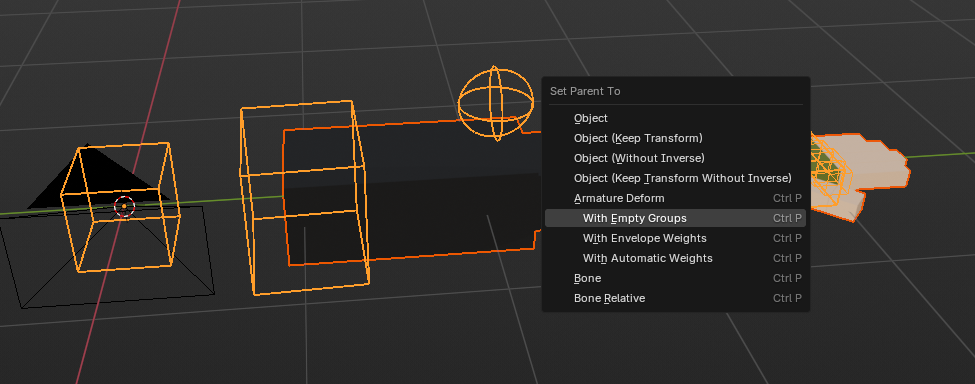
This has created various of vertex groups based on the bones of the rig. Since we only want to move the mesh, we can remove any vertex groups that are related to the camera or control bones.
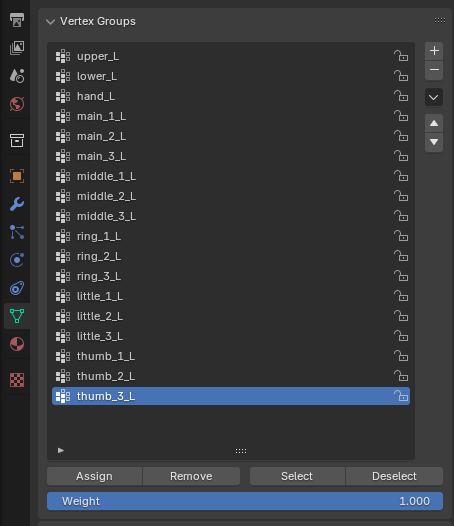
Select the arms mesh, and go into edit mode. Use the L button to in face select mode to select parts of the mesh, and assign them to the correct vertex group by clicking the assign button.
After you assigned all parts of the mesh to its corresponding vertex group, you should be able to go back into pose mode, select a controller bone, and the mesh should follow:
If there are any problems, check if all vertex groups have the correct parts of the mesh assigned. You can do this by pressing the vertex group, and then press the select button. This will highlight the part that is assigned.
If for some reason some parts dont rotate as expected, look at which setting the transform pivot point is set. In my case, it is Local and Median point.
Congratulations on rigging your FPS arm. If you have also followed the gun rigging guide, you should be ready to combine both the rigs to create first person animations!